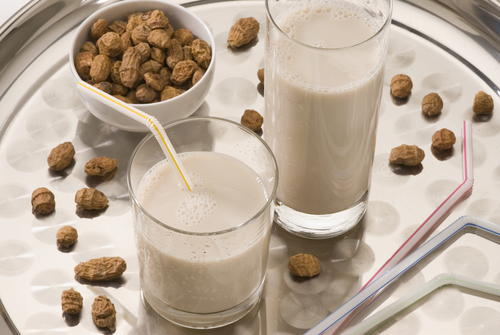
Many people are either allergic to or intolerant to milk. Other people avoid it for ethical reasons or to help balance their hormones.
This leaves people with nut, soy, coconut or rice milk as non-dairy alternatives. But what happens if you are also sensitive to these foods as well? Or what if you are dealing with autoimmune issues and chronic inflammation? Enter tigernuts!
If you are following an AIP (autoimmune protocol) diet, tigernut milk is an excellent alternative. Of course you can also have coconut products on the AIP diet but sometimes a person needs some variety!
Tiger nuts are not actually nuts, despite their name, and are totally AIP friendly. They are actually a small tuber. They look like nuts and are striped like a tiger which is where they get their name. They have a nutty and slightly sweet flavour which makes them perfect for making milk from.
My favourite uses for tigernut milk is in my coffee or tea, smoothie or paleo friendly cereal.
Tigernut Milk Recipe (Paleo, AIP)
Ingredients
- 2 cups tigernuts
- 7 cups water
- 1 tsp vanilla extract or 1 vanilla bean
*You will also require a nut milk bag or cheesecloth and a fine mesh strainer.
Directions
- Put your tigernuts in a large bowl, fill with plenty of water and cover with a clean cloth. Leave in room temperature for 24 hours. This will allow the tigernuts to become soft.
- After 24 hours, strain your tigernuts and rinse them. Put the soaked and drained tiger nuts as well as 7 cups of fresh water and the vanilla into your blender. Blend on high speed for at least 1 minute until the mixture is starting to look creamy and there are no large chunks of tigernuts left. If your blender is not big enough, you may have to do this in two loads and then you can combine everything afterwards.
- Strain your milk through your nut bag into a large bowl or container and squeeze as much liquid as you can from the bag to get every last drop. If you are using cheesecloth and a fine mesh strainer, line your strainer with many layers of cheesecloth before pouring it through.
- Pour your milk into Mason jars and keep in the fridge. It will last for a few days. Give it a good shake before each use.
- Freeze the extra milk in Mason jars.
Tip: leave some room at the top of the Mason jar so it’s not too full and don’t completely seal the jar when you first put it in the freezer so that the jar won’t crack or expand when the milk freezes. The next day you can seal the top completely after it has frozen and expanded.

Enjoy!


