DIY Nut Milk
For years I have been buying nut milk in a carton from the local grocer or health food store. Never did I imagine it was so simple and so tasty to make it right in my own home. Enjoy a variety of nut milks and try different recipes to sweeten and flavour the milk for what you desire at the time. This is such a treat and something that the entire family will enjoy. Whether it be for your oatmeal in the morning or a late night snack, this is something you will want to always have in the fridge. I will share my favourite milk recipe here as well as a couple of ways you can spruce it up.
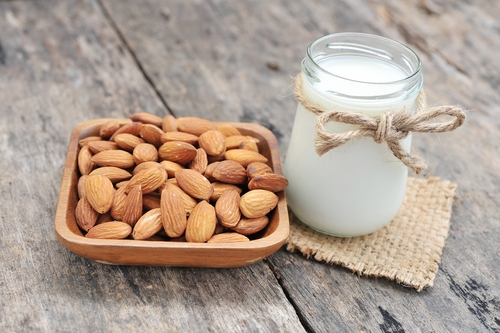
Almond milk has got to be my favourite, it has a full body taste and it also froths up nicely to add to a specialty coffee. I am sure you have heard many times how beneficial almonds are to the diet, in moderation of course. With only 40 calories per glass as opposed to the 86-122 calories of cows milk (depending on the fat percentage). Almond milk is also low in sodium and high in healthy fats. Containing 30% Recommended Daily Amount (RDA) of Calcium, 25% RDA of Vitamin D and a whopping 50% RDA of your Vitamin E. This delicious milk also contains plenty of B vitamins.
To make this delicious and nutritious milk at home, I would begin by seeking out organic almonds at your local health food shop. It is not often you find truly raw almonds as the USDA requires these nuts to be pasteurized. Because of their high fat content, they readily absorb pesticides this is why it is important to find organic almonds.
To start the process you will need:
- a high powered blender
- 1 cup or organic almonds
- a nut milk bag
Instructions:
- Soak your almonds overnight in about 4 cups of water, this makes them plump and juicy for your milk.
- After you have soaked the almonds overnight, strain and rinse before putting them in the blender.
- Add 4 cups of good clean water and put the lid back on the blender, this is a very important step!
- Start your blender with low power and gradually increase, blending for a total of 1-2 minutes depending on desired consistency and your blender.
- Once you have stopped the blender it is time to strain the excess pulp. Simply have a bowl handy, pour the milk into the bag over the bowl to catch the milk.
You will notice the milk will come threw immediately and you can also help the process by squeezing the bag. You will be left with almond pulp in the bag, you can reuse this as well!
There you have it! If you want to sweeten or flavour the milk in any way, you can add the ingredients while blending. I have tried vanilla, maple, and chocolate almond milk!